

A hedgehog hotel is something I’ve wanted to do for a long time now and today I spent the day putting it together.
This is all part of the wildlife garden I’m putting together, and having a hedgehog hotel is a nice supplement to all of the other wildlife features that are in place – like the bug hotel.
You may have noticed earlier that I’m getting into the habit of using egg shells as homemade slug deterrents, and having hedgehogs in the garden is a good excuse to move away from chemically based slug deterrents.
Why encourage hedgehogs to the garden?
Hedgehogs eat slugs and snails. As a gardener and allotmenter, (for selfish reasons) that’s the biggest selling point for encouraging hedgehogs into the garden.
That said, there is a greater, wider need to encourage hedgehogs, and this is because the British Hedgehog Preservation Society in July of 2020, announced that the hedgehog is close to extinction.
To make things worse, the Mammal Society conducted a survey in the August of 2020, which discovered that the extinction of the hedgehog was close to imminent, especially in Surrey, which is where I am.
Materials

As is with true allotment style, I built this with a pallet, some screws and other bits and bobs.
Now, with this particular build, pallet selection is quite important, as this is going to be home to hedgehogs, it’s best to use as friendly materials as possible.
If you look closely at the picture, you’ll see there’s a stamp on the pallet which indicates:
- IPPC: The International Plant Protection Convention helps to reduce the spread of pests for plants products internationally. This means, this is an international pallet, intended to move around the world.
- PL: Country of origin – Poland
- 04-522: This is a regional identifier, and this is a region in Warsaw.
- HT: This pallet was Heat Treated, which is preferable for this kind of project.
If you see MB on a pallet, the pallet was treated with Methyl Bromide, which is a toxic pesticide. In my opinion, think twice when using these pallets.
For more pallet advice, please see a great point of reference here.
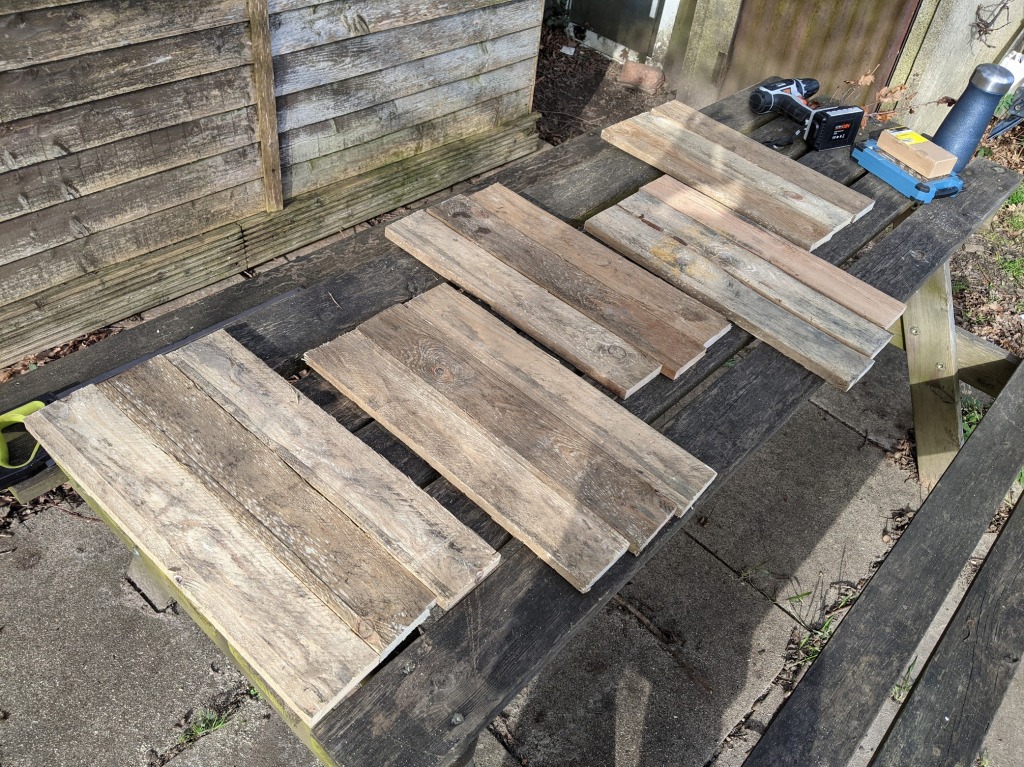
Making the sides
The first thing I did was cut the strips off of the pallet wood, which would go to make the four sides.
I then used strips of old deck board to brace the sides together, and also to help give me something to drill into, for when creating the actual box.
I didn’t actually measure anything when I was cutting the wood, but when screwing in the deck, I did make sure that they were at a 90 degree angle.
This allowed me to cut and shave as needed to make sure it was all square… Well, as square-ish as I could make it.


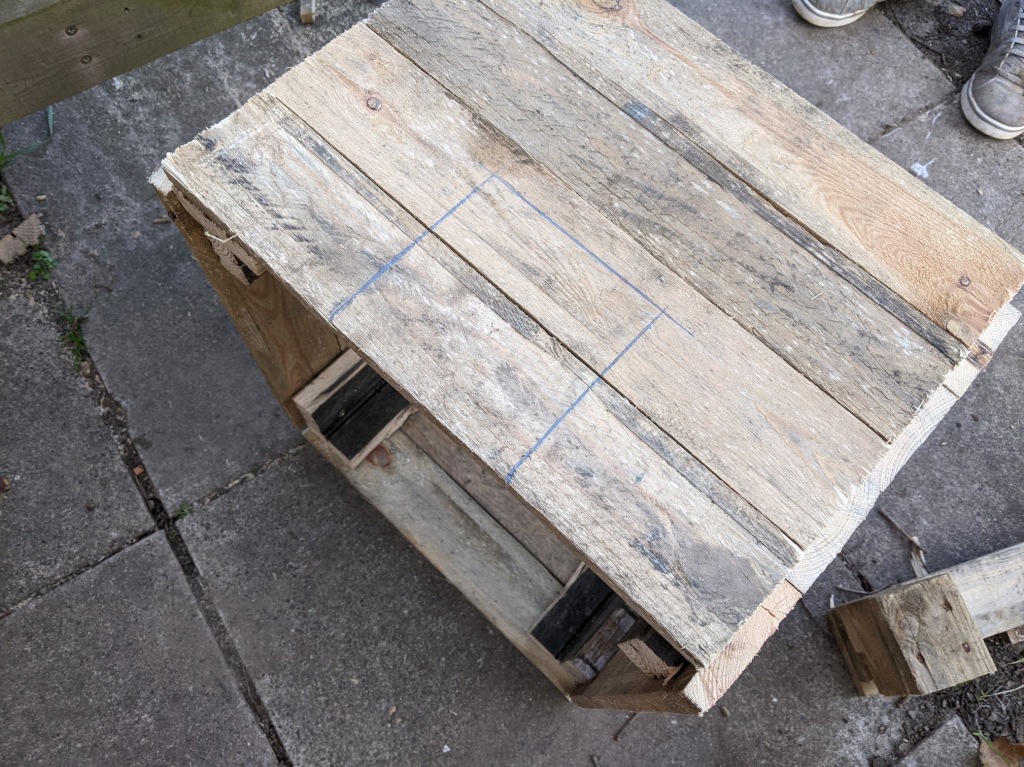
Making the hole
Now that the sides were all put together, the next thing was to make a hole for the little critters to enter into.
Having done a Google search, I’ve read that the ideal size for a hole is approximately 5inches (13cm). I cut this using a multi-tool (thank you for lending me that for this project – you know who you are!).
To add extra stability to the hole, I added a brace made from one of the off from the hole.

The lid
At this point, I hadn’t really put too much thought into the lid, outside of knowing that it needed to be made from wood.
I used three deck boards, which as tremendous luck would have it, were the perfect width of the whole box.
These were actually the same pieces of board I used to create the raised beds, so I cut them to size, leaving an overlap to act as a kind of canopy. The canopy is really just for looks and isn’t really necessary for a hedgehog hotel, but it looks nice. 🙂
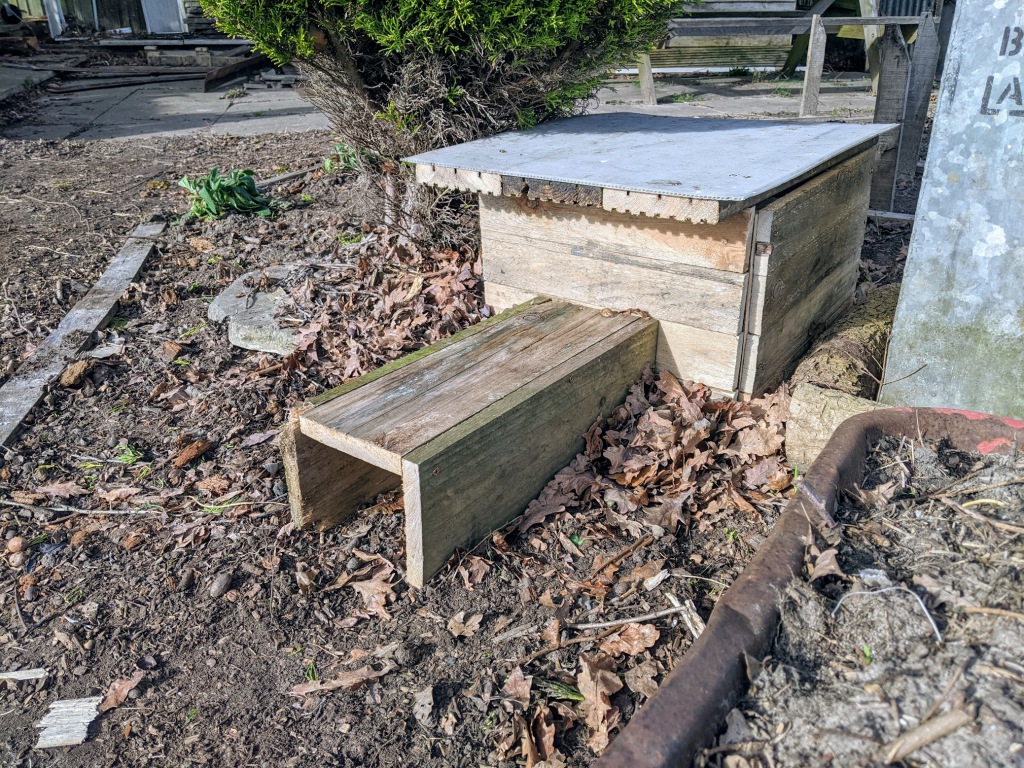
Next came the second piece of tremendous luck – and that’s that the piece of old perspex for the lid, fitted perfectly onto the lid, without having to cut anything. Love it when a plan comes together.
I wanted to add a piece of perspex to help keep it dry from rain water, and also it would match the bug hotel.
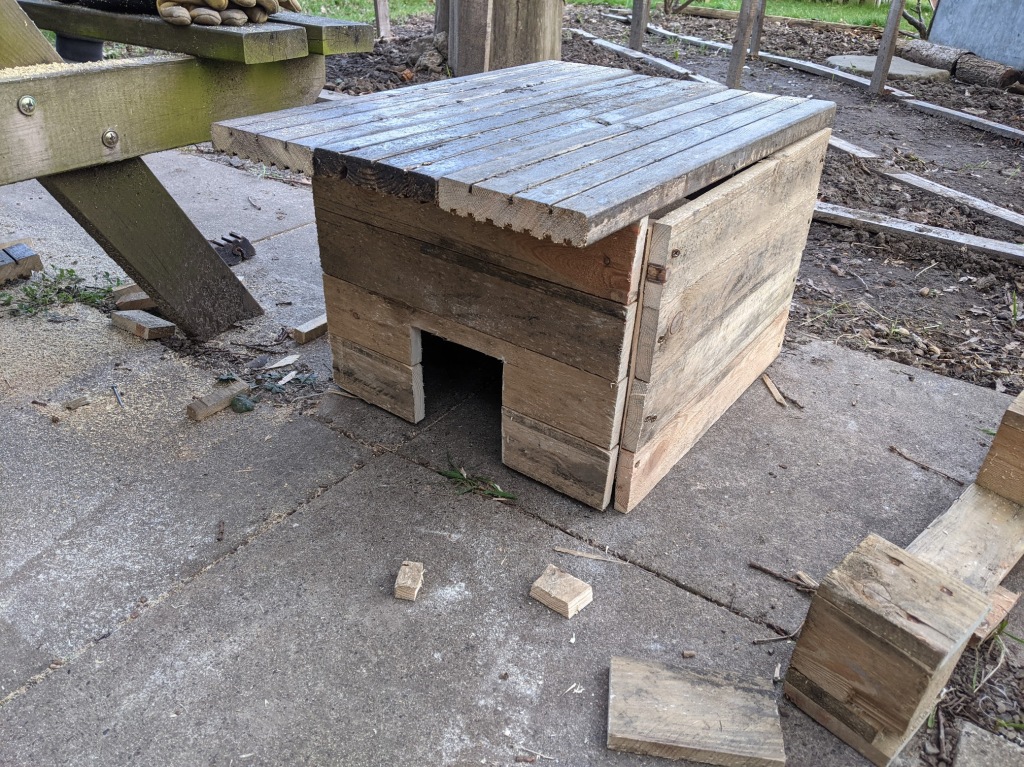

The tunnel
Ideally, I’ve read that a hedgehog hotel needs a tunnel at the front, and this is to help stop predators from getting inside of the box, and causing any damage.
This was easy enough to construct with some old scrap pieces of wood, and just drilled into the sides, around the hole of the box.
One thing I did make sure was that the hole of the tunnel was still that 5inches (13cm) in size to allow the hedgehogs to get in.

Placement
I placed the hedgehog hotel under the citrus fir, and next to the mini bug hotel, by the wheelbarrow bed.
The citrus fir will provide some extra shelter from the wind and rain, and hopefully the insects that the bug hotel will attract will act as a food source – I’ll also try and place in a water source nearby, out of an old bowl too at some point.
Around the back of the box and the sides, I added some old dead leaves – this is so that the hedgehogs can use this material to create a nest inside.

All in all, I think it all came together quite well, baring in mind that it was made from scrap wood and old pallet.
Hopefully, this will make for a nice residence for some hedgehog guests. Fingers crossed they go to town on the slug population too!
Have you had any experience with hedgehogs? I’d love to know what they are in the comments below.


Leave a reply to Neil Cancel reply